


I don’t know about you, but my social media has been full of cute pictures of kids heading back to school recently? The posts have a perfect mixture of excitement that normal is returning, and the nervous energy of will they remember how to behave in public, for both parents and children!
Last weekend, after 3 reschedules due to lockdowns and rule changes I finally made it to Vanilla Ink in Glasgow to take part in not one but two courses.

Now, I have barely left my postcode for 2 years, and in truth I wasn’t exactly a globe trotter before that either due to recently returning to work after maternity leave. Until this weekend I hadn’t left my little girl for more than a night, so let me tell you a flood of emotions all came out on the 6 hour drive up to bonnie Scotland!
But I have to say Scott and everyone at Vanilla Ink made me instantly feel like part of the family and I relished every moment in the workshop/classroom.

As a jeweller your education is never complete, the medium is vast, steeped in tradition and there are umpteen ways of making the same thing, the trick is to learn the way that suits you and your style best.
I had one day 1:1 wax carving with Scott McIntyre, the master of a sculpted swoosh and geometric line, learning wax carved jewellery techniques. And then two days of stone setting in a group of 8 other talented jewellers.
Day one: Wax Carved jewellery 1:1
Scott was kind enough to offer me a 1:1 day of wax carving, Vanilla Inks normal offering is an Introduction to wax carving course. I am a bit further along my learning than the beginner’s class, but there were some parts of the class that I have not done before, and I was keen to learn some tips and tricks from the master.
Scott taught me two ways to create a wax carved ring - a wedding band to perfectly match a shaped engagement ring. The first one the ‘customer’ wanted a plain band that perfectly mirrored the engagement ring. In the second they wanted something a little fancier and Scott encouraged that Louy Magroos style to come out and fully embrace the loose brief.

In the name of honesty, I had two attempts at both due to some suspect sawing (squiffy saw piercing has always been my nemesis). There are a few gaps, but I think that a little more time practicing I will have this mastered!
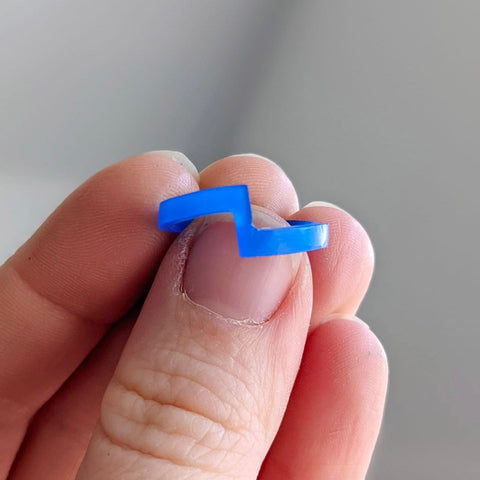

Which would you choose, plain or the elaborate?
Next up I had a go at carving a cabochon setting, accurate carving and wax removal to fit a stone snug and perfectly flat ready to be set.
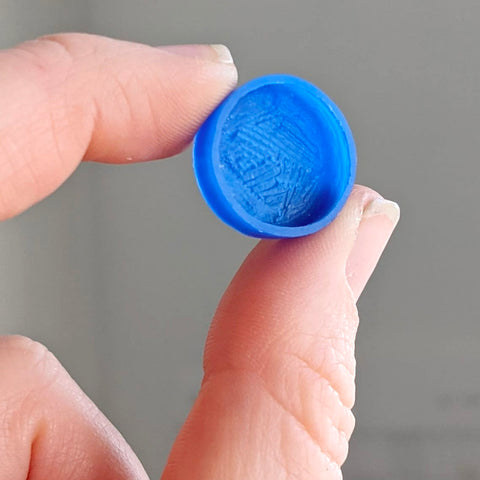
Last up, as a 30 min challenge I was given a chunk of wax and nothing more than a rough cut file to shape a man’s ring that replicated my previous elaborate carved wedding band. This task made me work fast, removing the wax quickly and instinctively rather than using precision tools. It was a good way to push me out my comfort zone and see what I can create with limited tools and time.

It needs some refining but not bad for 30 mins of frantic filing!
Day 2: Beginners Stone Setting – Bezel setting
Day two I was excited to get back to the workshop and even more excited to learn stone setting. Again, I am not totally new to stone setting but it is an area I have always lacked confidence and finesse, so I am so glad I went back to basics with this class.
First up was a bezel set CZ with a thin wall. Drilling out the tube to make the perfect seat for the facetted stone.

Next up we made a bezel setting for a much larger cabochon stone with a flat back plate. Similar to the setting I carved the previous day, it was good to see how both techniques have their pros and cons. 
Last task of day two was another bezel set CZ with a thicker wall and creating the seat with metal rather than drilling it out. This one was my favourite of the day, I love a thicker wall to stones, I think it allows the stone to really pack a punch and gives such a lovely geometric finish, which as you know I am all about.

Ps. I needed a long soak in the bath after day two as my poor arm muscles were singing! You need strength to push metal over a stone, but to do it correctly you use muscles that I for one do not use that often.
Day 3: Beginners Stone Setting – Claw setting
Day three was where it got FANCY!

We began with a simple piece of tube, tapered it into a collet, then with some clever cutting and filing we created beautiful claw settings with chamfered (sexy) edges. It was going so well; I was incredible proud of my beautiful setting… and then I set it! It went a bit wonky, I tried to compensate, and compensate, and then it went really bad (not pictured for my pride). Let’s just say this one I am desperate to try again to master, because it really is a beautiful way to create a special setting for facetted stones. I will get it next time!
 Last up a double gallery claw setting – COMPLICATED! I have to say I had doubts I was going to be able to do this and my confidence had taken a knock, but I was there to give it a go and that’s exactly what I did.

Again, starting with a tube and some small pieces of wire. We did some very fancy sawing (remember I am not a straight saw piercer!) some VERY delicate soldering, and before I knew it, I HAD DONE IT!!

Might not look much, and the scale is not what you would want for a wearable piece, but I have to say I am incredibly proud I managed this one. I even set that stone straight and its solid in its setting! The piece has two different types of claws as I wanted to try both out and as a sample practice piece that is exactly what it is for.
SO, what do you think, do you have a favourite type of setting?
I learnt so much more than just these techniques, and it has ignited a passion in me to learn more, practice more, and hone that skill so I am confident enough to offer it to you guys.
Here’s what I’ve learnt outside of jewellery techniques:
- Life isn’t about sticking within your comfort zone.
- It’s about putting yourself out there and pushing yourself and your skills as far as you can take them.
- Failure and making mistakes doesn’t matter
- Learning from those mistakes does
- And I need to remember to wear my glasses, I can see way more detail when I remember to do that!
And because of those lessons I am sharing my wonky setting mistake… because I know you guys have my back.

So, all in all a happy return to the classroom and I am keen to book in more next year. But for now, I am off to do everything again and practice and practice, just to see how much better I can get them all!
Be sure to follow me on Instagram if you would like to see more of my jewellery education journey.
-Laura
Leave a comment